Darling Butterfly

Followers

5/23/2012

Outlawz DT sketch challenge

     Hey there, so glad you dropped in. As you may know I am on the Wednesday Sketch Challenge design team over at the Outlawz and it's that time again for a fresh challenge, I was also responsible for posting this weeks challenge and wanted to share it with you here in blog land as well :)
     If you have never been to "The Outlawz" I suggest you come on over and check us out. We have a wonderful site with so many awesomely talented design team members as well as followers who enjoy joining in our challenges just as much as we enjoy posting them, and boy do they ever rise to the occasion. We love it!!
     We have a different challenge starting everyday of the week and one that runs every 2 - 3 weeks. We also have some awesome sponsors, so if you love to create/share and be in the running to win something awesome then The Outlawz is the place for you.
     Our challenges are
Sundays -  CAS- in other words "clean and simple"  
Mondays - Greetings - greeting cards, LO's etc that follow the weeks theme and have a greeting on it
Tuesday - Colour- just what it says....use the colours for that week, and include the twist ;)
Wednesday - Sketch - each week a different sketch to follow 
Thursdays - Twisted Thursday - Anything goes with a different twist each week 
Friday - Copic/Promaker - use alcohol inks and follow the theme
Saturday - Paper Ala Mode - create something from the theme provided
CFC - means creative freebie challenge, two very talented ladies who are also super sweet and kind provide the digi's for you to use to create anything you like. You have your choice of the digi's provided for that challenge, and two or three weeks to enter something, if you want to get more free digi's enter each challenge.
     Now doesn't this all sound like fun...you betchya....now I know not everyone has or uses alchohol inks, or maybe their style isn't CAS, but that's the beauty of it, there's lots of choices and awesome inspiration to keep you coming back for more. Hope to see you joining in all the fun soon!
Now for this week's sketch and my entry:  

     Well, what do you think? Please leave me a comment if you like my card, and/or if your going to check out "The Outlawz"! The butterfly is one of Sandi's free digi images, isn't is gorgeous, I love it! It is from a few challenges ago and I paired it with the MS jumbo butterfly punch to set the tone for my card. I wanted to try using different colours than usual, I'm more of a pink, purple or blue girl :) orange just isn't a colour I use very often. I used gel pens for the glittery look to my image and some stickles on the body and dots on the wing tips. The background paper is so pretty in real life, it is already textured and shimmery in a very pale yellow colour although on my screen it looks cream!

  Big inky hugs to all my crafty peeps 
    Cindy   :) 


5/16/2012

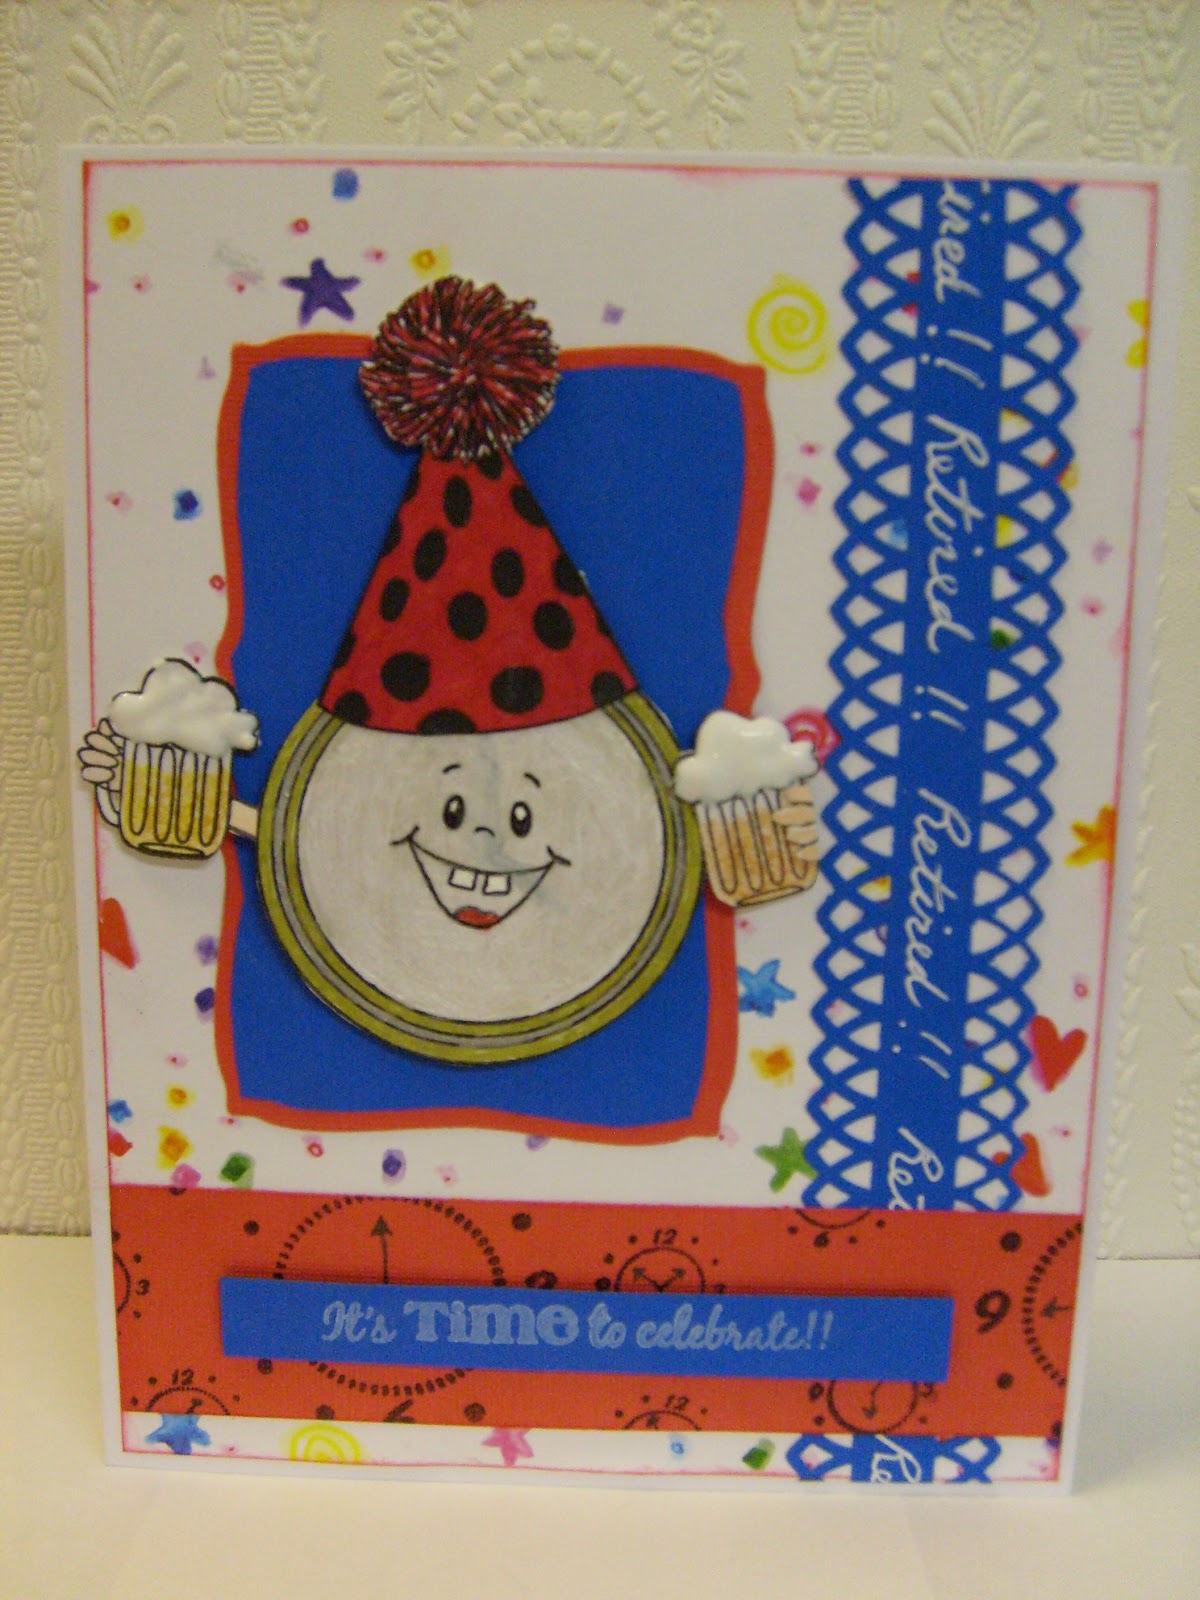
It's Time....

Challenge
     It's that time again for another Peachy Keen Challenge! This week it is a sketch challenge. I decided to make a retirement card using two of my aunt's 3 newest stamp sets that will be living at my house YAY!!!! Ty so much Aunt Kathy. And she entered her first PK challenge this week too, it's very cute, but she doesn't have a blog yet so she emailed it in!
    I have been busy busy all week and only had the last two hrs of the challenge left to come up with a card. I have been thinking about it off and on but just couldn't come up with anything. This isn't my best creation to date but it's still kinda cute, after all it's got a Peachy face on it which makes everything cute, thank goodness :) 
   I used PKSC-04 April 2012 for the stop watch, hat and sentiment along the bottom, and the clock faces for the red strip. For the face, arm with beer, and arm that I added another beer to after cutting it out of the hand  is from PKSC-02 February 2012.
     All paper is from my stash. I used my MS Arch Lattice border punch to make my strip down the right side and hand wrote Retired!! I used Spellbinders curved rectangles to cut the red mat, then traced the inside of the same size die on the blue and hand cut so I could have the slight edge effect.
     I used gold and silver gel pens to colour the stop watch, red gel pen for the tongue, my pearl pen to cover the centre area of the watch so it kind of looks like the background is made from a shell, some very expensive watches have that type of background for their faces and I love how they look :) I then used my snow writer for the foam on the beers :) Cheers
     I hope you like my card this week, it's not about to win any challenges I know but I had to play to get my name in for the draw at the end of the month for the $30.00 gift certificate from PK. Did you know that if you play every week, and I do :) you get a chance at winning one? You should join in the fun, there's a lot of awesome talent over there!
    Ty so much for dropping by, I hope you have a minute to leave me some love and I can visit you to see what you've been up to lately and leave you some love back:)  Have a great week and if this coming wkend is a long one for you, like it is for me have a great time and stay safe. May god bless you and yours, until next time happy scrappin' !

Big inky hugs
Cindy    :) 

5/05/2012

Souper Fun PK Challenge 16

     Hey there my crafty friend, ty for stopping by to see what I have for you today. The new Peachy Keen Challenge this week is to make a 3D project using a soup can! As soon as I saw that I knew I just had to make a luminiere. (At least I think that's what it's called, lol)
Here's my can before...
after
    A couple of  holes on the eyes got away from me, it was really hard to hammer a pin on the line when you can't see if your on it when your hand is in the way holding the pin. LOL But I didn't do to badly :) I used my copics for the nose and the cheeks, but the cheeks weren't showing up like the nose was so I used a pink sharpie.

    At first I was making it so it would hang from a branch or something and I'd put a candle in it for the light to shine through, then I thought ohhhhhh all the rain is going to get in and it will get all rusty. Plus I didn't want to use real candles because I painted the inside of the can white. Flames would wreck it and the can would get hot and black inside. I wanted to paint the outside to but it isn't easy stamping the face on a soup can,  it can slip giving you shadow lines, which happened to me on my first attempt. I am using Staz On black ink, luckily I can fix mishaps with a q-tip and some goo-gone but if I had painted it white, I wouldn't be able to do that. I had to erase the image a few times and start over trying to get a good impression. 
     You have to carefully ink up your stamp really well, position your can so it can't roll and lay your stamp over the area you want the image. Carefully press all the inky areas and try to push some of the ink pad into the ridges. I got really good coverage and only had to fix a few spots with my black sharpie. The first one I made with the opening at the top, and I used a small finishing nail to make all the holes but I could only manage to get the holes in the valley's of the ridges instead of the hills. The holes were all different sizes and although it was really cute and completely usable I started over.
    This time I turned the can upside down and made it into a table top ornament, I used a pin to make all the holes, they are more uniform, smaller and I could put holes in the hills and the valleys, it was much easier.
     To punch the holes I had an old Ferero Rocher container, I set the can in there with a plastic lid from the nails so it wouldn't move as I was hammering the pin, this worked out awesome.
     After I got him all full of holes I thought he needed something so I gave him a hat from half of a plastic bubble container I picked up at M's a while ago with lace in it. I just painted the inside of it with blue acrylic paint, and wrote my sentiment on the outside with a black sharpie.
         After all this I can't find my little battery operated candles, they must be packed away with my Christmas stuff, but I always have a few in here for different projects I make, no idea what I did them after change my rm around a few weeks ago, hmmmm. Oh well, no biggie, my MIL bought these light up footballs to put in some candle holders I altered a couple yrs ago for a wedding shower I put on, they glow blue and have 3 settings, I left it on the constant glow setting so it wouldn't be flashing, to hard to take a pic that way, LOL! 

I tried but can't get a good shot in the dark, I wish I had a tri-pod


     It's my youngest sons girlfriends B-day in 2 weeks, and he wants to give this to her, she will love it, she saw me making it and kept saying how cute it is, and that she wants to make one :) Her fave colours are blue and green, that's why I made a blue hat with green trim for it :) She doesn't know she's getting it, the hat fits perfectly, like it was made for this project and look what will be going inside!  :) She's gonna freak LOL How exciting!

     I hope you enjoyed my project today, and maybe you got some cool ideas floating around in your head now to make something like this. I actually want to make a bunch of these but with different faces, now I need the whole set LOL and I want them in my Gazebo hooked to the mini lights, that would be soooo cool :) I guess we better eat more soup, we rarely eat soup, usually only use it to make my noodles and sauce, mushroom pork chops or scalloped potatoes. But I need a bunch of these! LOL Thank you for dropping by, please leave me a comment so I can visit you too, I love to see what your up to and leave some love! Happy Scrappin!

Cindy   :)


5/02/2012

Made my own background paper!!!

     First of all, I'd like to thank the PK DT for choosing my garden markers for top 3 last week, I am so happy to have won this badge which I am trying to get on my blog to proudly display. Since they changed blogger on me I have been having a time figuring out how to edit stuff and add things other then blog posts. I think I have it fixed now but wanted to get this posted, the challenge ends in less than a half hr. Just wanted to say that, ty sooooooooooo much ladies, it means the world to me!  Big Inky hugs ladies. :)
On to my card........

Challenges
Just what the title says,  this weeks challenge over at Peachy Keen was to make our own. I've done that before, but I usually make scene's with clouds and stuff, on occasion I do the random stamping thing with versamark or coloured inks etc, but I wanted this paper to be special and I took extra care.
     I tried several different techniques until I made the one I really liked. In fact, I had one finished before this one and was going to post about it after dinner, but while preparing our evening meal an idea came to me. So, after American Idol was over (LOL) I quickly whipped up the card I am entering into the challenge. I used PK-268 Happy Mother's Day. I cut and folded a mauve card for my background. Cut a slightly smaller white mat for it and set to work. I wanted to use the butterfly from this set so I stamped it once in black on a scrap piece of white card stock, then carefully cut it out with my exacto knife.  


     On my white mat I randomly stamped it several times with a  purple Ink it up! stamp pad. Then I used the negative from cutting out the butterfly image and used it to mask off the surroundings of the image. I then randomly sponged pink and yellow MS chalk ink to the wings and used a q-tip to add green to the body. 
     After I got them all done I thought it looked really pretty but kind of bare. I got out a small background stamp from a See D's stamp set that came in a huge collection of 262 stamps, which consisted of several different sets but I don't know the name of the set, there wasn't any labels for them. I randomly stamped a light purple and some green in the white areas. 

     Added a ribbon and the layered pendant I made after playing around with my MS and Fiskars punches the other night. Made a bow for it added a few purple gems and called it done. The sentiment is from the PK Mother's Day set as well.
 I layered the two with pop dots and mounted it with pop dots as well.
The other night I was going through all my punches and trying to find their proper names so I can write them in my posts when I use them. On I believe it was the ED Success site they had a video about different ways to use your corner and border punches, I knew about doing the straight ribbons and cutting both sides but learned a trick to line it up correctly and learnt about making these pendant type shapes like you get in spellbinders sets with corner punches. I went crazy and have made them with every punch I own, now I am going to finish laminating them all, and use them as templates for my cards to see what I want to use on certain cards. My options have just expanded like crazy woohooo  :)
     If you like the paper I made, or think the techniques I used were inspirational please leave me a comment. I love to hear what you think.  Try the reverse masking idea, I don't know if it's been done before, I've seen people use the image to mask it from other images, but never seen anyone use the negative as a mask to colour the image, I like how soft my paper looks, and I am really happy with my card. :) Ty so much for coming by and checking out what I made for this weeks challenge. :) Have a great day and happy scrappin'

Cindy  :)


4/25/2012

Garden Markers meet Peachy Keen Stamps

                                              
   The Peachy Keen Challenge this week is a colour challenge. Not one of my fave's unless I really love the colour scheme and an idea comes to mind right away, otherwise I generally struggle. I have been trying to come up with an idea for this since I saw it on Friday, plus I had to move all my sisters scrapbooking stuff to my house on the wkend, get that all organized, and I am working on several projects for the big party at her house this wkend. This wasn't helping me come up with an idea, my mind was preoccupied on different colour schemes and themes. :) LOL

     Yesterday I was busily working away on one of the mini albums I am making for the party and was getting dangerously low on double sided tape. After dinner I went to the dollar store to get some and while I was there I figured I would look around and see if something sparks an idea for this challenge. When I walked down the summer isle  I saw these wide flat BBQ skewers and Eureka!! the idea of garden markers popped in my head.

    My nephew just asked me last wkend if I could make him some to mark his new veggie garden. He's only 12 but he has a thing for gardening, last year he did a lattice garden, and the yr before he planted a couple perennials behind the house. I didn't even think of combining his request with this challenge till I saw the skewers! Probably because I wasn't going to be working on them till after the big family get together. I called him and asked if it would be OK to use PK stamps on his veggies, he said "fine but please don't add the words, I'm not a little kid and will know what they are by the picture". :) LOL Okie dokie, he's to cute!!
When I got home I looked through my cricut carts Freshly Picked and Preserves to see what cuts I had, woohoo, I have all the ones he asked for....perfect!!
 I used my gypsy to size my veggie/fruit cuts, the only one's that were a challenge were the carrots and the pea pods since they are elongated. I needed them big enough for the tiniest faces but not to big for the marker. I had some large white bristol board pieces in my cardboard/chipboard bag, so I cut 8 rectangles out at 4"X6". The blue strips are 4" wide by 1.5"high. After glueing down the strips and setting the veggies/fruit on them I thought they looked kind of plain. Then I remembered he likes lattice so I used my provo craft cuttlebug lattice die and glued them on. Hmmmmm, nice but they still looked plain, I tried several different things but just couldn't decide what to put behind the veggies, designer papers and die cuts seemed to take away from the veggie/fruit and lattice but it still needed something so I did faux stitching in their coordinating veggie/fruit colour would work. I had them all done, pictures taken and I was working on this post when I looked at them and thought....oh no, What if I had to pick just one, or if the judges want to judge them individually instead of as the set....I will be disqualified because all the colours aren't on each on. So I went to work colouring and stitching the other colours on each one that wasn't there already.  This was one of the longest projects which should have been short but sweet, it was going so well last night! Oh well, it's all worth it in the end. 
      I used PK-450 Wide Eyed Kids Face Assortment for the lettuce, tomato, cucumber, squash, pumpkin and strawberries then PK-570 Basic Paper Doll Face Assortment Pkg for the carrots and pea pods.


Challenges
Oldie but a Goodie Challenge On the farm or in the garden
      Thank you so much for popping by, if you leave me a comment I will drop by to say hi to you and check out what you have been up to lately.  I'll see you soon, in the mean time have a scrap happy good time, and stay safe!  hugs


Cindy    :)

4/18/2012

Mother's hold their childs hand....

     Hello my crafty peeps, how have you been? I am as well as expected I suppose, look forward to feeling great again someday, hopefully sooner than later. Anyway just thought I would share the card I made for my DT Wednesday Sketch Challenge over at The Outlawz. 
My Interpretation
   What do you think of what I did with this sketch? I like pink and most cards seem to end up with pink on them, even when they start out a totally different colour scheme like this one did. LOL It was going to be a baby boy card, well you can see how well that worked out for me right, hehehe!
     I'm not crazy about the sentiment part and want to redo it, probably type it out so I can get the hole sentiment on there. I used my big clunky making memories magnetic alpha stamps to do this one. For my "squares" I used spellbinders layered flowers, and cut out the image with a spellbinders lacy circle in white and one in yellow to mount it on. The flourish is from die-namics and the bow is a pre-made from Wal-mart. I mounted it all on a yellow card front. 
     The image is a digi from our sponsor this month, Bugaboo....fabulous selection of gorgeous images and if you join in our sketch challenge this month you may win 7 free digi's....awesome prize, ty Bugaboo :)  Come on over to The Outlawz and check out our challenges! With a new one starting each day and running for one week, we are bound to have the type of card challenge you like best, with CAS, Greeting Card, Colour, Anything goes with a twist etc to choose from. 
     Our monthy prizes are amazing too, you don't want to miss out on chances to win awesome prizes from some great companies, like Oozak, Bugaboo, Paper Temptress, Gilli Rubber stamps, Stamp 'n' Doodle, Colour Creative Classroom and more :) See ya there!!!  :)
     Well ty so much for stopping by today and I hope to see you in the challenges over at The Outlawz, you'll be glad you came, it is fun, friendly and you get great feedback on all your entries  :) It's my favourite place to play, it gives me a direction for my cards, don't have to think it all out from scratch, I know what colours to use, or theme etc, makes it easier for sure. I hope you have a crafty rest of the week and the weather is good where you are, take care of yourself hope to see you soon :)

Cindy  :)


Peachy Keen Challenge 13 - Anything Goes

     Oh my goodness, I can't believe it's almost time to post another Pk challenge, and I haven't even posted anything since the last one. I just don't know where the time goes. I haven't been on my computer much for days not only due to my health issues but the health of my laptop as well, I think she's in her home stretch, although I pray she isn't, I would be so lost with out her.
     I'm thrilled that this week is anything goes, it's one of my favourite challenges. Back a few months ago, you may remember that I won a 4" stamp of my choice from peachy keen at the march release party. I love the face but it's not always easy coming up with projects to accommodate a stamp that large. A few weeks ago PK had it's April release party, which I missed :( but I did get to play in the challenges they posted for that wkend.
     The challenge was to use "peach" how appropriate :) As soon as I read it a giant peach popped into my head with this face on it, woohoo I was thrilled to get to use it again. When I read this week's challenge I just knew I could use my stamp again and I had several idea's come to mind. I really liked the way my "peach" card turned out so I decided to go with another fruit themed card, although I had several ideas going in different directions this face just didn't seem right for those ideas.
     After going through all my cartridges, several times I might add, I decided to use a  watermelon, but I had two sentiment's in mind and couldn't decide which one to go with so I made two cards :) I think they make cute ty cards and I am designing other "fruit themed" cards on my gypsy to match.
     I designed the easel card on my gypsy by welding together two watermelon halves and a plate. I did a lot of inking to the background paper as it was a reddish pink kind of sponged pattern but it had white area's in it. Of course this paper  was from my stash so I don't know who made it. Well I've had it for about 4, maybe 5 yrs so you couldn't find it now anyway.  The white paper I used for  my base is from provo craft, and the white I used to cover the plate is from Staples, the cream for the rind is from a mixed recollections pack from M's.
   I used a Martha Stewart small ink pad for the blue pattern and oval on the plate, and a yellow jelly roll glitter pen for the flower centres. The pattern is a studio G $ stamp from M's. A turquoise sharpie and jelly roll glitter pen for the sentiment, Onyx black Versa Fine ink for the face and glossy accents to highlight the eyes and nose. The watermelon seeds are cheap non stick gems from the $ store that I inked with black staz on ink and adhered randomly. As well as a  white signo pen for doodling and the whites in the eyes, and I used a pale pink copic (RV10) on the plate to resemble the watermelon juice.  Here's my cards :0)


     Challenges
     Well...what do you think? I think fruit and punny sentiments are so much fun and making these didn't disappoint :)  I hope you like my cards for this weeks PK challenge, excited to see what the next challenge is :) I hope you have a great week, and I hope to get some more blogging done. I do create alot of stuff, just seem to always be creating, never enough time for blogging. Take care, hope to see you soon, hugs!

Cindy   :) 

4/11/2012

Peachy Keen Challenge 12 - Sketch

     Hello again,  it's Wednesday and time to upload my card for this weeks Peachy Keen Challenge which is a Sketch. I drew the sketch on my white board and looked at it a dozen times a day since friday. I kept running ideas around in my head but nothing seemed right. Earlier this evening while trying to watch Idol but thinking more about the challenge it came to me. So I missed American Idol and came up here to create this!
                  The Sketch                                                                        

 My Card 

  Challenges
     
     I knew I wanted to make a Father's day card but everything I tried just wasn't working, sometime's I find it so hard to make masculine cards, do you have that problem to? 
     I made the strip with one of my EK success border punches that I ran through on both sides, wow that was close...it was just wide enough but I thought it looked pretty cool, what do you think? The strip on the inside is the negative from the stars I cut out to make a little banner that said Thanks DAD, but it didn't look right either. I used the small  fiskars four leaf clover punch to write #1 and to stand for two things  "your  #1" and "I'm 'lucky' to have you for my dad". 
     All paper is from my stash, I have drawers and drawers of scrap paper that I am trying to use up, I go to them before cutting a full sheet and rarely know who it's by. The stamp on the front is from a $1.00 studio G set from Michaels, the bird and the inside sentiment are from the PK-268 Happy Mother's Day set, but I didn't ink up the first part of the sentiment which says Thank you! The mats for my lil birdie are spellbinders classic squares and classic scalloped squares, I just doubled up the white ones to create my rectangle. What do you think? 
    Please let me kknow what you think of my card so I can pop over to you and check out what you've been up to lately and leave you some love to. Have a great day and happy scrappin'!

Cindy  :)  

4/03/2012

Case a Card

     Hello there, how are you? Today I thought I would share my "Case a card" with you. My favourite place to play is over at The Outlawz and I was asked to be on the sketch design team recently. What an honour that was :) It is an awesome site, everyone is so friendly and genuinely cares about you. There's chatting and sharing and of course prizes for the challenges. We have a new challenge every day that run for one week each, and one that runs 2 -3 weeks at a stretch. Won't you come over and join us, you'll be glad you did. The prizes are awesome, including 50.00 from Oozak every month, several different stamp companies, copic classes, cryogen paper for copics to name a few. And I hear we have an new one coming....something to do with copics :)
     Well the reason for this post is to show you the card I made for the Case a Card challenge in the Monday Greeting Card challenge last week. It was our faithful leader, Colleen Holmes birthday and our challenge was to case one of two of her cards.
     

These were the cards we could choose from, I chose the first one to case. We also had to change 3 things while still being able to see elements of the same design :)
 I used one triple layered butterfly, I forgot to emboss the background it sits on so I stamped it with versamark flourishy hearts. I doubled the amount of flowers, changed the shape of my sentiment piece and used the flourish instead of the ribbon. The colours are all in purples, I have such a time with some papers showing up their true colour. I cut the largest butterfly out of the deeper purple background piece and put a white mulberry paper that has hearts in it behind. I think it adds another layer of demension without really adding another layer. And added some yellow stickles here and there for my other colour, instead of pink.
     I hope you like my card, I'm not sure that I cased it very well, I'm not really very good at that but I do like how it turned out, don't you? Please leave me a comment so I know you came by and I can come visit you, and have a craft happy day.

Cindy   :) 

4/02/2012

Peachy Keen Challenge 11: 3D Object::Candy Containers

     Hello again my crafty friend :) Well this week's challenge over at Peachy Keen is to make a 3D container that holds candy, perfect timing with Easter next wkend. I made two egg shaped boxes for my grand nephews to hide a little surprise inside for them :)
     This paper was so pretty on both sides, I picked it up at one of the $ stores last yr I believe and just love it. It's thick and sooo colourful on one side and light with a scene on the bottom section and the sentiment on the top section with a big empty space in between, obviously perfect for a scrapbook page but it made for cute sides to my boxes. The boys are quite young and the boxes will be destroyed in no time, which is fine, but that is why I only put my time and effort into decorating the lids and making the boxes themselves.
 The eggs in the grass are mini stickers I stuck to cardstock and cut out
The bow on the lamb is a rub on, I just noticed I forgot to colour her nose, off to fix that up!
 
I still want to put a hot wheels car in the bottom and some jelly beans, right now I have tissue paper in the bottom for the chocolates to rest on, I will hide them under it, hehehe, so fun.
The lamb is cut at 3" from the Animal Kingdom cricut cart. I used the matching PK face stamp from PK-750 Animal Faces -small set made for this cart. The bunny is Paintin Easter Bunny by Cottage Cutz and has a PK face which comes with it, but this bunny was originally a peachy keen stamp that they had made into a die, isn't that the coolest. The grass is cut with the icicle MS punch, and the regular egg and scalloped egg shapes were cut using the Easter 2010 cricut cart.

How I made the boxes
 This was the second box, I didn't take pics while making the first one, didn't think of it :)
 I glued two scalloped eggs together to give a strong base to glue the box and lid pieces to.


Challenges

     I'm so glad you stopped by and I hope you like my project today. Maybe you will get a chance to make some of these for all the little ones on your list :) They are large enough for a small toy and candy/chocolate tooo! If your not doing a whole basket of stuff these are the perfect size. Please feel free to let me know what you have in mind, I'd love to pop over to your blog and see what you've come up with. I hope you have a great Easter if your celebrating the holiday. Take care of you and may you always be blessed with crafty time :)

Cindy  :)