Darling Butterfly

Followers

7/04/2012

You're tutu awesome!!

     Hey there, welcome to my blog :) Today I'd like to share with you my project for this weeks Peachy Keen Challenge 24: colour inspiration.

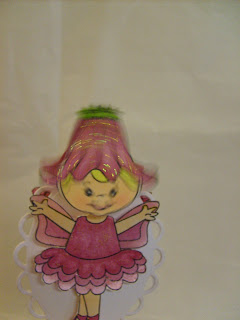
     My aunt came to visit on the wkend and brought with her a pile of new Peachy Keen Stamps to live in my Craft Room, YAY!!! Amongst them was the June stamp club set and is it ever cute. I just knew that these little fairies would be so adorable on so many projects and wanted their first inking to be for something very special! 
     I set to work and made a cupcake trinket box from paper and cardboard. Starting with a 5"  cardboard circle, then figuring out the centre point and using a 2.5" circle to mark the inside. I drew even graduations making it easier to make sure my segments were even and cut to the middle circles edge. Place a 2.5" styrofoam ball in and hot glue your segments in place being careful not to get any on the styrofoam ball.


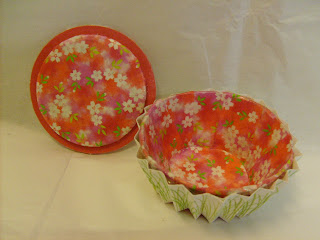
added strips of origami paper and decopauged them in place, then made the base for the lid from two 3" cardboard circles. 
Made the lip of the lid from two sides of a ribbon roll, cut slightly smaller and glued together with two layers of  double sided sticky foam between so the lid won't slide off. Cut a 12"X1.5" strip of white cs, stamped the "grass" in two shades of green along the strip, then accordion folded it to make my cupcake wrapper giving me my white and green for the challenge :) 
I cut a 3" styrofoam ball in half and hot glued yellow/orange prima flowers to the ball with lrg ball tip pins that I coloured red with a sharpie, giving me the other three colours required. 

I stamped the cute fairy image twice, and used a different face for each, coloured her up, then painted her with fruit punch stickles to give her a shimmer, I stamped and cut her wings out of vellum then coloured in with gel pens, and guess what.....??????  :)
Challenges

She spins......the skewer is glued in place and she is just sat on it, just blow and away she goes. 
Plus I added two action wobbles that I cut down, so her head wobbles to and frow as well, not sure if you can make them out in this pic, probably can see it better if you click on it  :)
seeeeeeeee......

     lol lol she really is tutu cute, I can almost hear her yelling weeeeeee as she spins and wobbles and shakes. I made her removeable mainly so she would spin but also so if I want to put a cherry on top I can just remove her, cut the skewer down and add one, if I can find one that is, LOL Then she can go on a skewer and some little girl can have fun making her spin round and round!!!  LOL
     I thought this would make a cute bday present for a little girl, and she could hide her favourite little trinkets inside. If you made a bunch they could be cute party favours for a fairy bday party :) I wanted to add Hey there Cupcake, just whirling by to wish you a fairy happy birthday, but when I looked at the mini set to this one there is a stamp that says wishing you a fairy happy birthday, so I just used one of the stamps that came with this set! :)

     I have so many idea's of cute things to make for this set, so stay tuned... LOL !!! And ty so much for stopping by, always happy to see people have stopped by and left a nice comment for me, and I always try to get back to your blog right away to say ty for the love, see what you've been up to and leave you some love in return. Sometime's it takes me a bit, sry about that, life gets in the way! 
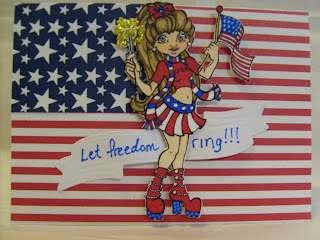
     Have a great rest of the week, big inky hugs!!!  P.S. - to all my American friends Happy 4th of July.....I bought a Mayzy stamp and in your honour made you all a card :)
For more of her digi images visit her blog at www.mayzyart.blogspot.com and check her out, she's amazing, and her prices are fantastic, you even get a free stamp each month with your order, woohoo!!! 
                                                                    Isn't she adorable :)  

     I even made this one for all my Canadian friends but sadly life got in the way again and I didn't get her posted yet. 

  I did share her with my DT sisters over at The Outlawz though, have you been there lately, the big 2000 member party has been extended through this week, so if you were to busy last week to play the games and enter the challenges you still have time, come on out and join us, you'll  have a blast and meet so many awesome people, not to mention all the fabulous prizes we have lined up for you, hope to see you there!!! 


Cindy  :)


6/27/2012

Have a ton of Fun

     Hello there my crafty friend :) Do you know what time it is? It's Peachy Keen Challenge time and this week it's "Anything Goes"! Everyone's favourite challenge, right?  Well it's one of mine for sure, free to create whatever I want....oh ya, bring it on :)
     I was excited when I saw what the challenge was because I have gotten so many new PK stamps lately that I just knew I was gonna have fun with it. After much debate, (with myself, lol) I decided to use PK-223 Baby Elephant, it is sooo cute, I just love it. I thought maybe it would be cool to make the background resemble a baby's quilt, and used a variety of pieces from my stash, lord knows I have a ton of little pieces, I don't throw away much.  :)
     I used Memento tuxedo black to stamp my image, sky gray color box for the stitching and copics to colour this little cutie. I cut him out with a Spellbinders classic circle, used a Spellbinders lacy circle for a mat and popped my image on the "quilt". I added an "It's a Boy" charm with limeade We R Memory Keepers bakers twine and a couple buttons for embellies. I used CC-PK4X4-024 Happy go lucky elephant die to cut the "splash drops" and added glossy accents, to represent the milk from his bottle.
Copics Used:  C3: body, E000 toe nails, YR20 nipple, R82 tongue, B00 diaper pin, R20 ears and hooves, W3 for the shadow in front of him and some of the top section of his bottle. EK Success chalk for the cheeks! 


I'd like to enter my card into the following challenges:

Peachy Keen 23: Anything Goes
The Paper Shelter: Punches and/or Dies
Scrapbook Sisters Card Challenge 90: Anything Goes
Wish Craft Cards ~Waste not Wednesdays: Week 24
I used old scraps of dp, buttons (rarely use them) the metal 
sentiment from 4 yrs ago and the felt diaper from 3 yrs ago   


     Thank you so much for dropping in to have a peek. Have a great day, big inky hugs my crafty friend! See you soon. If you get a chance please leave me a comment, and I'll pop over to see what you've been up to lately! 


Cindy   :)

6/24/2012

It's finally here!!!


            YAY.... YAHOO.... YIPPEE....                             it's finally here..... Yup, today's the day to party!
Welcome to The Outlawz Blog hop!
We have  LOTS of prizes; so please read the directions carefully!

     This isn't just an ordinary blog hop! There are 8 blogs for you to visit. Each blog has either a tutorial on how to make something or a technique pertaining to paper crafting!
     Each blog has a prize, and there is a grand prize for one person who visits and leaves a comment on all 8 blogs, and becomes a new member of The Outlawz!
     To be eligible for the prizes, please leave a comment on each blog.  If you become a follower (of the blog) you will have two chances for that blog's prize!  Each blog has a different prize, so you will want to visit all of them! Let's get hopping! Have fun and good luck! 
     To win the grand prize for visiting all the blogs and leaving a comment for each one - go here and enter your name at the bottom of the page by clicking on the blue froggy to add your link.  Don't forget to join The Outlawz...you'll be glad you did :) 
     So like all blogs if you came here by chance and because you got an email from me, do yourself a favour and start at Colleens blog, you want to be in on all the prizes. And when your done the hop and you join The Outlawz, join in the challenges for you chances at even more prizes....this is one party your gonna LOVE!

GOOD LUCK!!  GOOD LUCK!!  GOOD LUCK!! 
Blog Hop Order

The Outlawz Host: Colleen Holmes 
CAS Host: Pryn Garritan
Greetings Host: Tina Gilliland
Color Host:  Teresa Arsenault
Sketch Host: Cindy Potentier  me :) 
Twisted Thursdays Host: Patricia St Martin
Copic/Promarkers Host: Darlene Lyons
Paper Ala Mode: Theresa Lee

How to make paper beads
     Back in May of this year I was looking for something on youtube and kept seeing a video for this pop up even though it wasn't anything to do with what I was looking for. I actually can't remember what it was I was looking for lol! Anyway, I finally decided I had two birthdays coming soon and this may be a great gift idea, what would be the harm :) I'm glad I did, I ended up making two, one for my aunt and one for my youngest sons girlfriend. 

 I cut my strips at 3/4" X 12" but you can cut them wider or narrower and shorter making different sizes of beads.

 I used double sided scrapbooking paper and rolled them with opposite sides up giving me two different colour beads. The video I saw and a few others I looked at, it appeared the maker was using 8.5X11 plain white paper not cs, and using specific markers to add colour to the strips before rolling. 
 I used a toothpick to roll the strips up and glue in place.
Coat 3X with diamond glaze letting dry completely between coats.
Instructions thus far...cut strips, roll and glue, 2-3 coats of diamond glaze, drying in between  coats, then decide how you will string them together. You can buy empty necklace rings at the $ store, just add the beads and any embellies you like, you can even add real beads if you like! Or try stretchy necklace cord, wire, string....whatever you prefer will work.  I used wire and made loops at each end making all the beads individual then hooked the wire loops together and added a charm in the centre for each necklace.  :) 
 My sons gf really likes skulls, seems to be the norm these days for these kids, so I found some of these skulls at the local craft supplies store here called Flim Flam. They have a lot of bead making supplies and their prices are fabulously cheap.

For my aunt's I saw this little teapot set and thought, omg that's so cute, she would love that, so I searched for the perfect shaped bead for it and found this pretty blue one to go with her green and blue necklace,  she loved it!! 


     You can even make earrings to match. My aunt and I started a pair when she was visiting last to go with her necklace but we didn't get them done and she took them home to finish. Unfortunately she has been to busy with work to get them done, so I've suggested she bring them back when she's down for the coming Canada Day long wkend. 


     The prize for my blog is a 1 year subscription to TTCRD Magazine which is ran by the one and only Colleen Holmes, creator and fearless leader of The Outlawz and one spectacular lady! TTCRD stands for Through The Craft Room Door and you can find the info for this amazing magazine here!
                         
 GOOD LUCK!!  GOOD LUCK!!  GOOD LUCK!!

Thank you so much for popping by, I sure hope you take advantage of ALL the fun and join in the challenges tooo :)

 Big inky hugs my crafty friends!!
Cindy  :)

6/20/2012

It's almost here!!!


     Are you ready to party? We are! Yet again we're partying at The Outlawz; this time we're celebrating you, our 2000+ members! The party is running June 24 - 30, and we'd like your help to get the word out. Of course, we wouldn't ask you to do this without offering something in return. There will be a prize for one of you! :D
In order to earn entries into our random prize drawing, you can:
1. Post our party banner in your blog's sidebar, then enter your blog's address into Mr. Linky. Here is the code to copy and paste...
<iframe src="http://files.bannersnack.com/iframe/embed.html?hash=bun3gjkh&bgcolor=%233D3D3D&wmode=opaque&clickTag=http%3A%2F%2Foutlawzchallenges.ning.com&t=1338867856" width="200" height="167" seamless="seamless" scrolling="no" frameborder="0" allowtransparency="true"></iframe>
2. Share Jo's awesome YouTube video about the party in a blog post or on Facebook, Twitter, and/or Google+. Click the link to go to the video, then click Share. Choose the logo of the application you'd like to use to spread the word. Once you've shared the video, click the title of the post (blog) or the date/time stamp of your post (FB, Twitter, G+) to go to the page that is solely for that particular post. Copy the web address and add it to Mr. Linky. You get one entry per location.

3. Create a video response to Jo's YouTube video. Make your video, then click inside the Respond to this Video box. A link will show up underneath the box that will allow you to post a video response. Follow the directions to upload a new video or link to a video you already posted. Then enter the address of your video in Mr. Linky.


You have until 12:00 am EST on June 28 to do one, two, or all! and enter your link(s). Good luck!


Go Here to enter your link for your chance to win!!! But hurry....the list is getting long already :) 


6/15/2012

It's a Party

     Hey there, am I happy to see you! Why? Cause I wanted to let you know about the party that's gonna be going on starting June 24th and running through till June 30th, I guarantee you don't want to miss it!! Where? Over at The Outlawz, it's gonna be tons of fun, with games and lots of great prizes from our wonderful generous sponsors.
     What are we celebrating? We reached 2000 members, that's not only a huge accomplishment but a great reason to Party, not that we need a reason, LOL it's always a party over at The Outlawz. Great friends, fun conversations and lots of awesome prizes to be had in the on going challenges.
     This time the theme for the party is   "Where in the World!" We want to know where you are from-your country, state, province, street - or where ever your heart longs to be! We have members from all over the world and they would love to share where they are from with you! Won't you come share too?!?!
     So bookmark us, mark us on your calendar, set an alarm, write it backwards on your forehead or tie a string around your pinky...whatever it takes to remind you to come play and have a blast with us!  I was brand new to The Outlawz for the 1000 member party last Oct. This time around I'm on the Sketch Challenge team that runs on Wednesday's and I love it! 
     At this party we'll have an 8 blog "Tutorial/Technique"  hop, a crossword puzzle,  Bingo, a word scramble,  and of course each DT will have a challenge for you to enter showing us where your from. Doesn't this sound like fun? I think so and can't wait to get this party started!
    I wanted to add to links to this, really cool ones from over at The Outlawz but I am still having trouble with them, enough that it is giving me a headache, so I'll try again later! See you soon my crafty friend! Thanks so much for stopping by :) hugs

Cindy  :)

A "Peach" of a sketch

     The new challenge is up and it's a sketch this week. As soon as I seen it I went straight to work on my card since I don't have time to torture my brain this week, and with Father's Day on Sunday I am all set. Well almost, I was planning to make him a #1 dad frame, the one I was trying to come up with for last weeks challenge.  My hubby is having brain surgery on the 19th and I have a bunch of things on my to do list to get done and out of the way between now and Monday, so yes...I am early posting for the challenge!
Challenges

     The plaid paper is from the 6.5 X 4.5 DCWV Tahiti Beach Stack I bought a few yrs back, I love the prints in this, I also have the 12X12 stack. DCWV is one of my fave paper companies. The blue paper is recollections and the yellow is a misc. piece from my stash drawer. 
     I made the "tie's" from pieces of ribbon and added pearls to the brown and cream tie's and gems stuck to a mini piece of wire I twisted, they are suppose to represent the "tie tacks" men use to keep the shorter end of the tie from popping out the sides. :) ( at least I think that's what they are for, LOL)  I had them all the perfect length to match the sketch but they started freying and I had to cut them down again, they took to long to start over. LOL
     I stamped the winner's ribbon on matching piece's of the blue and yellow paper and cut out the blue one by hand. Then cut out the yellow circle with a spellbinders circle die, and did the same for the small blue circle and stamped the sentiment in the centre from PKSC-05 May 2012 kit of the month. I used the same set to stamp the sentiment in the bottom right hand corner. :)
     I hope you like my card today and ty so much for stopping by. Please leave a comment and I will come see what you've been up to. Have a great day and happy crafting! Hope you have a great wkend, and everyone's special "DAD" gets treated right. See you all when I can, big inky hugs!!!


Cindy   :) 


6/13/2012

You've been framed!

     It's another Peachy Keen Challenge and this time we were to create a 3D object using frames! We could upcycle, use a cheap dollar store one, die cut one, or use our creative imagination to come up with something totally unique!!
     I had two idea's I was working on but neither one of them felt right, and the more I tried to get them to come together nothing was working, it kept nagging at me. I finally had something going late last night after trying for days but I was really tired and decided to finish it when I got up. Thing is when I woke up I had a whole new idea in my head so I came straight to my CR and set to work.
     I told my sister that I would make one of my baby name frames for her grandson's 1st birthday, which isn't until March 2013. They have been going on a hippo/zoo theme for the nursery and I was going to do a large hippo, but when I woke up my mind had kind of expanded on it a bit LOL!!!
I had to take the picture without the glass in because I was getting to many reflections, seeing me and what was behind me in the glass doesn't make for a great pic, lol but it looks great with the glass in....honest.... LOL
Challenges
     What do you think? I think it's way better than just a hippo in the middle don't you? I used my "Puffy Clouds" and "Wrought iron gate" memory box die's. The gate was cut 8X and I made little acryllic things to give them depth without using pop dots so they wouldn't show. At first I cut them out in grey then decided they blended into the hippo to much so I cut them again in white and glued on top of the grey one's so I wouldn't have to make those things again, LOL!

     I used a bunch of those acryllic things I made behind the boy and the tree as well. I love these 3D shadow box frames from Michael's, you can add so much depth to your designs. There is still room, the leaves of the tree don't touch the glass yet :)

    I made the hippo using the "Animal Kingdom" Cartridge and the PK-750 Animal Faces (sm) that co-ordinate with it. For the sun I used PK-M16- You are my sunshine, and PK-450 wide eyes kids for "Colton"  :) The grass was cut several times with a Cherry Lynn "grass border" die and over lapped. I cut the tree by hand then punched all the maple leaves with a small fiskars punch :}
     The outfit is a Jolee's sticker, I removed the arms, glued to white paper and cut out, drew on the red stripes on the reverse and reattached to the body of the sticker backwards so I could bend the arms. I made the neck and pop dotted the head off of it and added the hands, both from the "Everyday Paper Dolls" cart. Those little overalls are so adorable :) I made the running shoes using two circles cut from the smallest spellbinders circle die. I cut the rocks using "Plymouth Rock" from the "My World" cricut cartridge, I just hid the numbers that are on it, and a couple of the lines, as well as cut out twice.
     I added some little things for him to find when he's a little older, lol, like the pond, (if you look closely the hippo is standing in it ), the bird in the tree, (MS punch n stamp), the butterfly on the fence (small fiskars punch) and three ants (hand drawn) walking off with some of the hippo food that fell out of the little bag Colton is holding. :) He won't be able to find it probably but on the tree I drew a heart and put his parents initials in it, M+J, lol! I also added a tiny pop dot behind each of the hippo's ears to make them pop forward. And drew a couple birds flying in the distance :)
     I used several ink pads, markers and gel pens to add highlights, shading and edging here and there. I hope you like it, I have more baby names frames I made last yr and the yr before in another post here, here and here if you'd like to take a peek! :) I just realized there are two more I haven't blogged about that I made for my grand nephews :) Oh well, some other time....I am beat, this project has consumed my whole day!
     I'm so glad you came by to check out what I made for this week's challenge, I hope you like it and maybe you've been inspired to make your own for your kids or someone else's, they are fun and when they get older you can change up the theme for them, you are only limited by your imagination which I know is awesome, I've see your stuff....LOL! Take care, see you again soon I hope, please leave me a comment so I know you were here, I'd love to come see what you've been up to, bye for now my crafty friend. Keep your rubber in the ink!!! LOL LOL


Cindy   :)


6/06/2012

Splish Splash

     It's a "Pool Party Bash"!  This weeks Peachy Keen challenge is Just cards and I have been trying to come up with a card for this adorable stamp! PK-M08 mini piggy tubby time, isn't it just to cute.
PK-M08 Mini Tubby Time
     I wanted it portrayed as a pool so I cut it out and layered it several times omitting the bubbles and covering the ones in front of the wash tub with a beach ball :) I thought about colouring the tub in different colours to make it look like one of those rainbow blow up pools but didn't want to change it that much!

Challenges

I layered it several times so the right piggy would be stuck out in front of the left one and so the tub itself would stick out in front of both of them giving them dimension and depth. The umbrella is cut from my Shower Peepers die CC-PK4X6-005. I love the dies just as much as the stamps, and they can all be co-ordinated with each other so well. I used PK-150 Accessories Assortment One to give them sun glasses :) I was so happy their was a pair small enough, ty Kathy J!  :)
     I painted a round toothpick white to be my pole to my beach umbrella but couldn't find it when I went to add it, no idea where it ran off to, lol so I cut the centre out of a q-tip and used that instead :)  

     The very back scalloped circle mat is a quickutz die and the pink and top ones are the two largest spellbinders Peony dies. I used copics to colour my grass, tub, piggies, beach towels, umbrella and two bottom mats. I don't have blue so I used prismacolour pencils to do my sky. :)  I drew and coloured the splashes on then covered with baby blue stickles, added stickles to the water in the tub as well to make it glisten. I randomly added some "stickles puddles" of water on the grass. :) The beach towels are a See D's stamp, they were to wide so I cut some off of them. The patterned designer paper is a very old piece of BoBunny from my stash, (I hope I remembered that right, it's the only thing I didn't write down, I noticed the name when I was added the double sided tape) 
     I am so happy you had a chance to drop by and check out my latest PK challenge card, it took me forever to make this one, including starting several other cards, lol! I have some background for other cards ready now LOL! Let me know what you think. Thank you so much, hope you have a great rest of the week, keep the rubber in the ink and stamp, stamp, stamp!  

Copics used:  Piggies:  RV10, E21, E00 cheeks, R20
                      Grass: YG17, YG03, G17 colourless blender 0
                      Umbrella and pink and green mats : R81, YG03
Prismacolour Pencils used :  Sky  304, 364, PM-121 colourless blender
                                           Water: 305, 320     baby blue stickles


Cindy   :)


5/31/2012

A sketch and a Jeep

     Hey there my crafty friend, so happy you popped on by. I have a new card for the Wednesday Sketch challenge over at The Outlawz that started yesterday. Sure hope you can join us, would love to see what you come up with!
The Sketch
My take on it using a digi from Sandi Huggett - Sandi Samples:)
Challenges
     I am entering this card into Challenge #26 Photo Inspiration over the Through the Craftroom Door. Which is where I got the inspiration for my colour choices from :) It is another awesome site where you can play in challenges for a chance to win something,  oh my how fun, I just love it :) Alot of my friends from The Outlawz play here too, so come check it out and play along there too, combine the two challenges to double your chances...cool huh? 
    If you have a minute please leave me a comment, I love to read them and it helps me find you so I can see what you've been up to. Also if you would like to play along with us in the challenges please visit us at 
The Outlawz :) Ty so much for stopping by, have a great day, big inky hugs!

Cindy  :)

5/30/2012

Time to Party!!

     Hey there, it's Wednesday once again and time to enter my card into this weeks Peachy Keen Challenge which is colour inspiration :) I have always been fascinated with the patterns on peacock feathers, they are so beautiful!
 
     Immediately I figured I'd use an elephant taking care of the grey, and following suit with my card base in the same colour, although it is barely noticeable in the pic, on my screen anyway. Once again all papers are from my scrap stash, (I have so much of it) but I do know the solid papers except for the navy and grey card base were from  recollections 8.5X11 sheets. The designer papers are old pieces I've had for about three yrs.
     I originally made an elephant from the New Arrival cart and using the Pk stamp set to match, then at the last minute I decided to use my Happy Go Lucky Elephant from the Cottage Cutz spring collection, it's so adorable and I hadn't used it yet. The clock and sentiment are from the PKSC-04 April stamp kit of the month and the Happy Birthday strip was cut with a MS jumbo punch. The turquoise doily was made using a Fiskars round doily punch and I backed it with a 4" doily from the $ store.  My sentiment is stamped on a really pretty piece of purple paper but on my screen it looks kind of washed out, I sure hope it looks better on yours lol!
The elephant was cut out twice, popped up off the doilies and his ears and trunk are popped up off the first elephant so I could hang the clock from his trunk.
I even made him a hat using the same stamp set and glued on a piece of a cotton ball for the pom pom but I think he looks cuter without it, what do you think? It is green with navy spots, but they looks black! 


Challenges
     I am so glad you dropped by to check out my post today and hope you like my card. It think it would make a cute invitation as well as a bday card, what do you think? Well I am just getting this posted with less than and hr to spare so I need to get it linked up. I love to read your comments and appreciate them so much, ty!  Big inky hugs and happy scrappin' 

Cindy    :)


5/24/2012

Spreading my Wings

     Today I discovered that Market Street Stamps were illustrated by Angelica Suarez, how I missed that I have no clue. I couldn't figure out why they are sold on the Peachy Keen Site and now I know, LOL!! Angelica is a talented artist and I love that most of her stamps are accompanied by words of wisdom. Now I have something else on my wish list to collect,  ohh boyyyy!!! LOL
     Anyway, when I checked out the MSS blog I noticed there was a challenge and decided to make a card for it. Why not right :) Time to spread my wings, move on to new sites, maybe even get lucky and be chosen for another Design Team, or a guest designer spot, heck I might even win a prize, wouldn't that be cool!! :)
     In order to play along in this MSS challenge I had to own at least one of their stamps, lucky for me I do hehehehe, it's called Believing Butterfly and it's only 5.00 awesome stamp set (includes two) fantastic price, that's why I bought it, lol I love butterflies and it fit my budget. You get a beautiful butterfly (of course) and an encouraging sentiment.
      The challenge is called May "Paint the Town" colour challenge. We need pretty pink, rose bud, mellowed mellon and vintage glass green. Now you don't have to use the exact colours, just pick from your stash what you feel best represents them, perfect I have a ton of stash lol !

Challenges


     My flowers are light pink prima's bunched together and hot glued to resemble carnations. I brushed the tips of the petals with a MS rose ink pad. I stamped the butterflies 6X and layered to sort of give the illusion of flight. Two sets were stamped with two shades of pink which really isn't evident now that I tried to add some definition to the pattern with a gel pen. :) The third set was done is a pale orange melon colour paired with yellow, then tried to define with a yellow gel pen as well. :)  The bodies and antennae have Eucaluyptus stickles and the wings on the top two have fruit punch stickles and the one on the bottom has some yellow and some spiced marmalade brushed on them with a paint brush, while wet I shaped the wings a bit.  


     The lighter green flourish is a Die-namics die, the larger is a Cherry Lynn die that I cut apart and randomly placed. My fleur de lis die cut is a light melon although on my screen has a deeper orange tone. I placed a 4" doily behind it to give it a bit more shape and soften the melon against the green check. I added a really pretty green almost aqua or turquoise looking but it was sheer so I added the rose paper ribbon stuff and tied a bow with the piece I cut off. I love to add pearls or gems to my cards and pearls look great as butterfly trails. All the papers used are bits and bobs from my scraps drawers which I store by colour, I have a lot of scraps :) I rarely cut a fresh piece of paper. 
     So that's my card for this challenge, if your interested in playing along please join us as I'm sure the DT would love to have you. Also one randomly chosen lucky participant will win a stamp set of their chose with a 15.00 value...SWEET, I could use more MS stamps so of course I wanted to play along!!  LOL  Have a great day, hope to see you in the challenge. good luck and go get inky :) Bye for now, till we meet again my sweet crafty friend!
   P.S.  I just found another fun blog and decided to enter my card in their challenge too. I checked out their site and it sounds like great fun with lots of opportunities to win great prizes woohoo come check them out over at the  Little Miss Muffet Challenges blog! There's still five days to enter and I am entry #104, wow, I hope Mr. Linky likes me LOL 

Cindy        :)  big inky hugs 

5/23/2012

When your under the weather

....take time to get better!


Challenges
     I really wanted to make a project using the May stamp club set but nothing I came up with was feeling quite right. When I was looking around the Challenges at The Outlawz I seen this one and thought hey I could use my Shower Peepers for this one cause it has an umbrella, then thought, oh hey I could enter it in both challenges, woohoo :) LOL  This is what I came up with, hope you like it, hope PK likes it more :) I almost gave up and wasn't going to do this weeks challenge but I don't want to miss a week, you never know I might get lucky and win the monthy prize, well, I don't have much luck so maybe not but if I don't try I won't for sure right :)
6X6 base-baby blue recollections cs
I used the rainbow stamp from PKSC-02 February kit to make my background paper
the rain boot paper is by American Crafts
I made vellum overlays for the rainbow and rain boot paper because the bright patterns were over powering my focal image
Traced my focal image diecut and hand cut to make a mat for it, the diecut is from the Fleur De Lis Motifs Spellbinders Shapeabilities set.
I used my Shower peeper for my focal image, and just hand made the little flower pot, I wanted to use the stamp of the cup of hot coffee from the April stamp set but the image was to big for my little peeper to hold :)
Covered the umbrella with a piece of acetate to make it look shiny
The doily strip was made with a Nellie Snellen border die and cutting both edges, then I used a fiskars ribbon hole punch to thread the light green ribbon. My sentiment is from the PKSC-04 stamp set.
Added some orange gems to the focal die cut, gave the flowers some shape and added stickles to the centres, plus added those cute gems for raindrops :) 
Hope you like my card this week, here's the bg  paper I made for it :) 
 After colouring them in with my Prismacolour pencil crayons I smoothed out the colours using a fantastix colouring tool and some Goo Gone, a lot cheaper than Gamsol and works pretty good softening the strokes, I just started in this picture :)
 All finished here, looks smoother don't you think :)

     Well ty so much for coming by to see what I have been up to, I hope you  leave me a comment, I would love to see what your working on and what challenges you've entered lately :) Have a great rest of your week, big inky hugs my crafty peeps :)

Cindy